
Step-by-Step: Creating the Perfect Bars
Phase 1: Making the Peanut Butter Base 🥜
Prep the Pan: Line your 9×13 inch pan with parchment paper, leaving an overhang on the sides. This “sling” will be your best friend when it’s time to lift the bars out! 📎
Melt the Butter: In a microwave-safe bowl or a small saucepan, melt the 1 cup of butter. Set it aside to cool slightly. 🌬️
Combine the Wet Ingredients: In a large bowl, mix together the 2 cups of creamy peanut butter, the slightly cooled melted butter, and the 1 teaspoon of vanilla extract until well combined and smooth. 🌀
Add the Dry Ingredients: Gradually add the 3 cups of sifted confectioners’ sugar, the 1 ½ cups of graham cracker crumbs, and the pinch of salt. Mix on low speed, or by hand with a sturdy spatula, until everything is evenly combined. The mixture should be thick, stiff, and hold its shape. If it seems too dry, add a splash of milk; if too wet, add a little more sugar/crumbs. Note: Do not overmix! ✋
Press into the Pan: Transfer the peanut butter mixture to your prepared pan. Use your spatula or the bottom of a glass to firmly and evenly press the mixture into the pan. You want a dense, compact layer. 🏋️
Chill Time: Place the pressed base in the refrigerator while you prepare the topping. 15-20 minutes is perfect. 🧊
Phase 2: Preparing the Glossy Chocolate Topping 🍫
The topping needs to be smooth, glossy, and pourable, yet firm up nicely.
Melt the Chocolate: In a medium saucepan over low heat, or using a double boiler, combine the 1 cup of butter and the 1 ½ cups of semi-sweet chocolate chips. Stir constantly until the mixture is completely melted and silky smooth. Avoid high heat, as this can cause the chocolate to burn or seize. 🔥
Pro Tip for Shine: Adding a tablespoon of vegetable shortening or coconut oil here can enhance the natural shine of the chocolate! ✨
Whisk in the Extras: Remove the pan from the heat. Whisk in the 2/3 cup of confectioners’ sugar, the 1 teaspoon of vanilla extract, and the 2 tablespoons of milk/cream. Continue stirring until the topping is perfectly smooth and has a lustrous, spreadable consistency—like a thick liquid fudge.
Pour and Spread: Carefully pour the warm chocolate mixture evenly over the chilled peanut butter base. Use a spatula to gently spread it to the edges. Work relatively quickly, as the cold base will cause the chocolate to start setting immediately. 🏃♀️
Final Chill: Return the pan to the refrigerator. Allow the bars to chill for at least 2-4 hours (or preferably overnight) until the chocolate topping is completely firm and set. 😴
Page 3: Cutting, Serving, Storage, and SEO Tips 💡
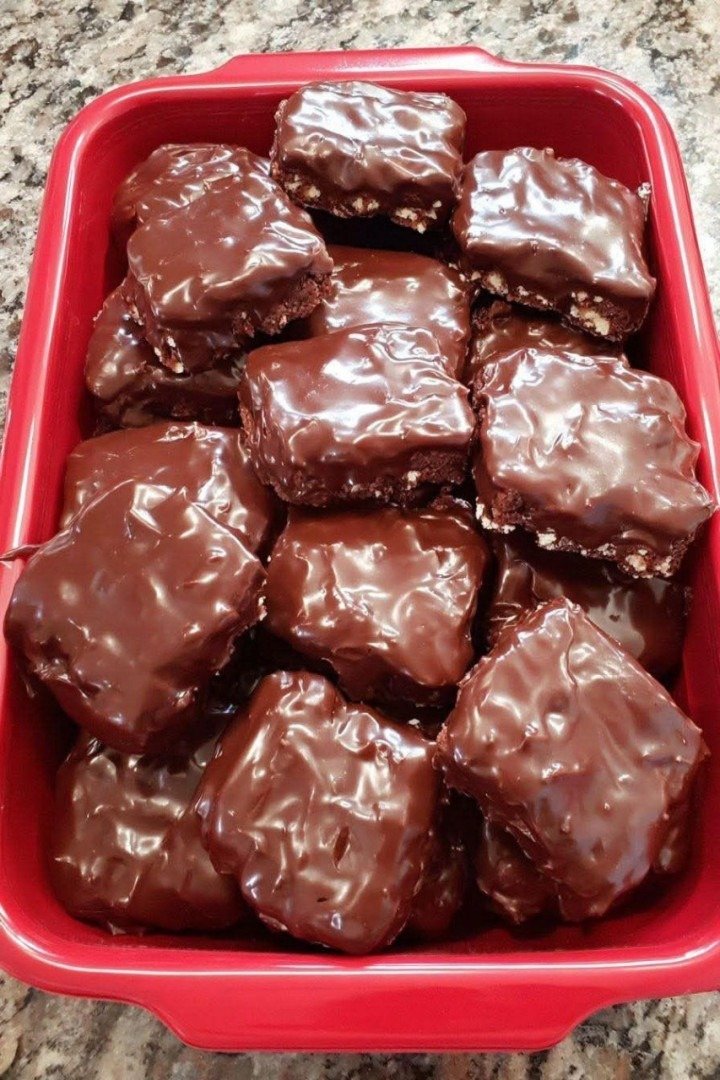
You’ve made it! The bars are chilled, set, and look absolutely magnificent—just like the ones in your photo! Now for the final, crucial steps. 📏
🔪 Cutting the Perfect Square
This is often the trickiest part, but with these tips, you’ll have perfectly sharp edges every time:
Warm the Knife: Before cutting, run a sharp, non-serrated knife under hot water, then wipe it completely dry. The warm blade will slice through the chocolate topping cleanly without cracking it. 🌡️
Make the Cuts: Use the parchment paper overhang to lift the entire slab of bars out of the pan and place it on a cutting board. Make your cuts in one swift motion, cleaning and re-warming your knife after every few cuts. The size of the squares in your image looks to be about 2×2 inches. 📐
Arrange and Serve: Stack the cut bars in your favorite serving dish—perhaps a vibrant red one like the one in your photo! 🟥
🍽️ Serving and Presentation Ideas
Dusting: A light dusting of powdered sugar (after cutting) contrasts beautifully with the dark chocolate. ❄️
Garnish: A sprinkle of coarse sea salt 🌊 (if you’re a fan of the salted chocolate trend!) or a drizzle of melted white chocolate adds flair.
Portioning: They are rich! Remember, these are decadent, so smaller squares are often better.
📦 Storage and Shelf Life
Room Temperature: Not recommended for more than a day, as the buttery base softens quickly.
Refrigerator: Store in an airtight container for up to 1 week. They taste fantastic cold! 🥶
Freezer: For long-term storage, wrap individual bars tightly in plastic wrap, then place them in a freezer bag. They can last up to 2-3 months. Thaw them in the fridge overnight before serving. 🧊
💖 Why This Recipe Works: The Science of No-Bake
The secret lies in the high fat content (from the butter and peanut butter) and the high sugar content (from the confectioners’ sugar). This combination doesn’t require heat to bind and solidify. The chilling process simply firms up the fat, creating a dense, satisfying texture that melts beautifully in your mouth. 😋
📈 SEO Keywords & Optimization
To ensure this recipe ranks well and reaches a wide audience, here are the key phrases we’ve included and optimized for:
No-Bake Chocolate Peanut Butter Bars (High-volume primary keyword)
Fudge Peanut Butter Bars (Related term for texture)
Easy No-Bake Desserts (Broad, high-traffic category)
3 Ingredient Peanut Butter Bars (While we use more, “easy” versions are popular)
Chocolate Peanut Butter Treat (Versatile, search-friendly)
Best No-Bake Recipe (Aspiritional keyword)
Homemade Peanut Butter Fudge (Related search)
Meta Description Idea: Skip the oven and make the BEST No-Bake Chocolate Peanut Butter Bars! This easy recipe features a rich, dense peanut butter base and a glossy, smooth chocolate fudge topping. Perfect for holidays and quick treats! 🥇
Enjoy your absolutely delicious and stunning bars! Happy no-baking!
ADVERTISEMENT
