
Introduction
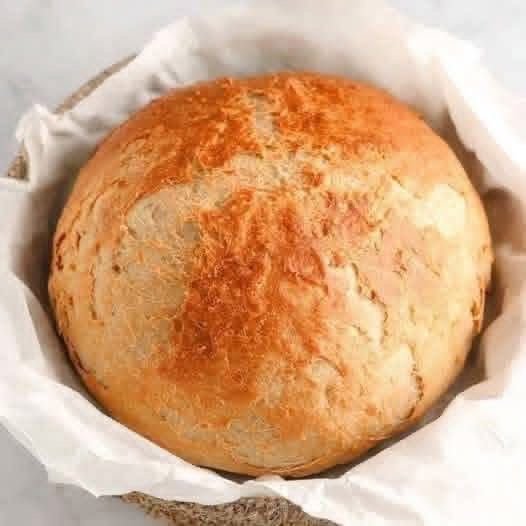
Imagine the aroma of freshly baked bread filling your kitchen, a golden-brown crust crackling as you slice into a soft, airy interior. Sounds like a dream, right? Often, baking artisan bread at home feels like a daunting task, reserved for seasoned bakers armed with complex techniques and endless hours of kneading. But what if we told you that achieving this culinary masterpiece could be incredibly simple, requiring minimal effort and no special skills? Welcome to the magic of No-Knead Artisan Bread – your gateway to homemade bread perfection.
This revolutionary method strips away the intimidation factor, proving that beautiful, crusty, and chewy artisan bread is well within your reach. The secret lies in a long fermentation process and high hydration, which allow time and water to do all the hard work of developing gluten, eliminating the need for strenuous kneading. The result? A loaf that rivals your favorite bakery’s, with a wonderfully irregular crumb and that signature rustic charm, all achieved with just a few basic ingredients and a Dutch oven. It’s a game-changer for beginners and experienced bakers alike, promising stellar results with unbelievably little active time.
Whether you’re looking to impress guests, elevate your weeknight meals, or simply enjoy the immense satisfaction of baking from scratch, this No-Knead Artisan Bread recipe is a must-try. Prepare to be amazed by how easily you can transform simple staples into a loaf of pure delight. The process is mostly hands-off, involving a simple mix, a long leisurely rise, and a hot bake. Get ready to experience the joy of truly homemade bread – crusty on the outside, tender on the inside, and utterly irresistible.
Nutritional Information
Per serving (approximate values):
Calories: 180
Protein: 6g
Carbohydrates: 35g
Fat: 1g
Fiber: 2g
Sodium: 350mg
Ingredients
3 cups (360g) all-purpose flour or bread flour, plus more for dusting
1 ½ teaspoons fine sea salt
¼ teaspoon instant yeast (or active dry yeast, proofed)
1 ½ cups (360ml) warm water (about 105-115°F / 40-46°C)
Optional additions: 1 tablespoon fresh rosemary, chopped; ½ cup shredded cheese (cheddar, Gruyere); 2 tablespoons mixed seeds (sesame, poppy, flax)
Instructions
Mixing the Dough: In a large mixing bowl, combine the flour, salt, and instant yeast. If using active dry yeast, first dissolve it in the warm water for 5-10 minutes until foamy, then add to the dry ingredients. Pour the warm water into the dry ingredients. Using a wooden spoon or a spatula, mix until just combined and no dry streaks of flour remain. The dough will be very shaggy and sticky – this is perfectly normal and desired for a high-hydration no-knead dough. Do not overmix. If adding optional ingredients like herbs, cheese, or seeds, stir them in now.
First Rise (Bulk Fermentation): Cover the bowl tightly with plastic wrap or a kitchen towel. Let the dough rest at room temperature (ideally 68-72°F / 20-22°C) for 12-18 hours. A longer rise time develops more flavor. The dough should at least double in size, become bubbly, and have a slightly boozy aroma. If your kitchen is warmer, the rise might be quicker (closer to 12 hours); if cooler, it might take longer (closer to 18 hours).
Prepare for Shaping: Once the first rise is complete, lightly flour a clean work surface. Gently scrape the dough out of the bowl onto the floured surface. Avoid deflating it too much.
Shaping the Dough: Lightly flour your hands. Gently fold the edges of the dough towards the center, forming a rough ball. Flip the dough over so the seam is underneath. Using your hands or a bench scraper, gently cup the dough and pull it towards you, rotating it slightly, to create surface tension and form a taut, round loaf.
Second Rise (Proofing): Line a medium-sized bowl (about 8-9 inches in diameter) or a proofing basket (banneton) with a generously floured kitchen towel. Carefully transfer the shaped dough, seam-side up, into the prepared bowl or basket. Sprinkle a little more flour over the top of the dough. Cover loosely with plastic wrap or another towel and let it rest for a second rise for 30-60 minutes at room temperature. During this time, the dough will puff up slightly.
Preheat Oven and Dutch Oven: About 30 minutes before the end of the second rise, place your Dutch oven (with its lid) in the cold oven. Preheat the oven to 450°F (232°C). It’s crucial to let the Dutch oven preheat thoroughly to achieve that perfect crust.
Baking (Lid On): Once the oven and Dutch oven are fully preheated, carefully remove the hot Dutch oven from the oven using oven mitts. Be extremely cautious as it will be very hot. Gently uncover your proofed dough. If using a towel-lined bowl, invert the dough directly into the hot Dutch oven (you can use parchment paper to help lift it if preferred, placing the dough with the parchment paper into the pot). If using a banneton, gently flip the dough onto a piece of parchment paper, then use the parchment to carefully lower the dough into the hot Dutch oven. If desired, you can lightly score the top of the dough with a sharp knife or razor blade before baking (a single slash or a cross). Immediately place the lid back on the Dutch oven.
Bake with Lid On: Bake for 30 minutes with the lid on. The steam trapped inside the Dutch oven will help the bread rise beautifully and create a fantastic crust.
Baking (Lid Off): After 30 minutes, carefully remove the lid from the Dutch oven. Continue to bake for another 15-20 minutes, or until the crust is a deep golden-brown and sounds hollow when tapped on the bottom. The internal temperature should be around 200-210°F (93-99°C).
Cooling: Carefully remove the bread from the Dutch oven (using oven mitts and the parchment paper if you used it) and transfer it to a wire rack. It is absolutely essential to let the bread cool completely for at least 1-2 hours before slicing. Slicing hot bread can result in a gummy texture inside.
Cooking Tips and Variations
ADVERTISEMENT
